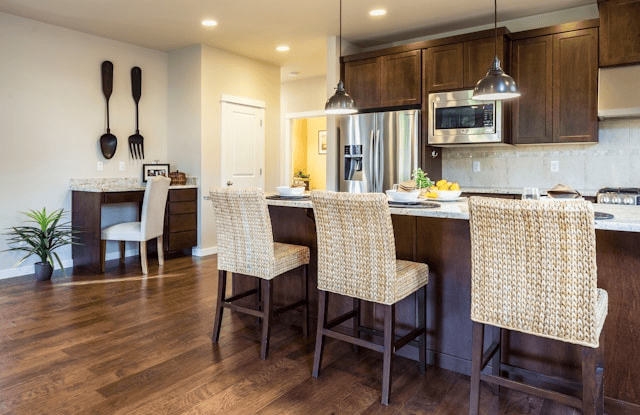
If your kitchen is starting to feel outdated but you’re not ready for a full remodel, refinishing your cabinets can offer a dramatic transformation at a fraction of the cost. Knowing how to refinish kitchen cabinets yourself is a game-changer for homeowners who want a fresh, clean look without breaking the bank.
Whether your cabinets are solid wood, veneer, or previously painted, this step-by-step guide walks you through everything you need to know from prep to finish to tackle this rewarding home project confidently.
Why Refinish Your Kitchen Cabinets?
Kitchen renovations can be expensive, but refinishing wood cabinets is a budget-friendly way to breathe new life into your space. Instead of replacing them, DIY cabinet refinishing allows you to:
-
Save thousands on renovation costs
-
Customize color and finish to match your kitchen’s style
-
Improve the look of your cabinets without compromising quality
-
Boost your home’s value with minimal investment
If you’re ready to roll up your sleeves, let’s dive into how to refinish kitchen cabinets yourself with tools, techniques, and insider tips to get professional-looking results.
What You’ll Need
Before starting your cabinet refinishing project, gather the following materials and tools:
Essential Tools & Supplies
-
Screwdriver or drill (to remove doors and hardware)
-
Painter’s tape
-
Degreaser or TSP (Trisodium Phosphate)
-
Sandpaper (100–220 grit) or sanding sponge
-
Wood filler (for repairing dents or holes)
-
Tack cloth or lint-free rags
-
Primer (for painting) or wood conditioner (for staining)
-
Paint or wood stain (depending on your finish choice)
-
Sealer or polyurethane topcoat
-
Brushes, rollers, or paint sprayer
Optional but Helpful Tools
-
Power sander (to speed up sanding)
-
Drop cloths or plastic sheeting (to protect your kitchen)
-
Labeling tape for organizing cabinet parts
How to Refinish Kitchen Cabinets Yourself
1. Remove Cabinet Doors and Hardware
Start by taking off all cabinet doors, drawers, and hardware. Use a screwdriver or drill and label each piece for easy reassembly. Keep screws and handles in a labeled bag or container.
2. Clean and Degrease All Surfaces
Over time, kitchen cabinets collect grease and grime. Use a degreaser or TSP solution to thoroughly clean all surfaces. This step is crucial paint or stain won’t stick well to dirty or oily surfaces.
3. Sand the Cabinets
Sanding is one of the most important cabinet refinishing tips. It roughens up the surface so that the new finish adheres properly. Use medium to fine-grit sandpaper and sand all doors, frames, and drawer fronts. If your cabinets are already painted, sand until the surface is dull and smooth.
For glossy or laminated cabinets, a power sander or deglosser may help create better adhesion.
4. Repair Any Imperfections
Fill dents, holes, or deep scratches with wood filler. Once it’s dry, sand those areas smooth and wipe down all surfaces with a tack cloth to remove dust.
5. Apply Primer or Wood Conditioner
-
If Painting: Apply a high-quality primer suitable for your cabinet material. This helps with paint adhesion and ensures an even finish.
-
If Staining: Use a wood conditioner to prevent blotching and allow the stain to soak evenly.
Let the primer or conditioner dry completely before moving on.
6. Paint or Stain the Cabinets
Now the fun begins. Use your preferred color or stain to give your kitchen a brand-new look.
-
For painting kitchen cabinets: Use a foam roller for flat surfaces and a brush for corners or grooves. You may need two or more thin coats for full coverage. Let each coat dry thoroughly.
-
For staining: Apply with a cloth or brush, then wipe off excess with a clean rag. Repeat until you achieve the desired depth of color.
Drying time can vary, so be patient. Good results take time!
7. Apply a Protective Topcoat
To make your cabinets durable and easy to clean, finish with a clear polyurethane topcoat. This protects against moisture, stains, and everyday wear. Choose between satin, semi-gloss, or gloss depending on your style.
Tips for a Smooth, Professional Finish
-
Work in a well-ventilated space or outdoors if possible
-
Use painter’s tape to mask off walls and areas you don’t want painted
-
Label all cabinet parts as you go to avoid confusion later
-
Use high-quality brushes or rollers to avoid streaks or brush marks
-
Don’t rush allow proper drying time between coats for best results
Common Mistakes to Avoid
Even if you’re excited to get the job done quickly, cutting corners can lead to disappointing results. Here are a few common errors first-timers make:
-
Skipping the prep work: Don’t underestimate cleaning and sanding. Paint won’t stick to grease or gloss.
-
Not removing doors or hardware: Trying to refinish cabinets while still installed can result in drips and uneven coverage.
-
Using the wrong paint or stain: Not all products are suitable for kitchen environments—always choose high-quality, moisture-resistant finishes.
-
Rushing through drying times: Applying additional coats before the previous one is dry can lead to peeling and bubbling.
Budget and Time Considerations
Refinishing kitchen cabinets yourself is far more affordable than replacing them. On average:
-
Materials cost: $100–$300 depending on the size of your kitchen
-
Time investment:
-
Small kitchen: 2–3 days
-
Medium kitchen: 4–5 days
-
Large kitchen: Up to a week
-
This timeline includes drying time and depends on how many coats you apply.
Conclusion: You Can Do This
Learning how to refinish kitchen cabinets yourself is one of the most rewarding DIY home projects you can take on. With a bit of planning, the right tools, and some patience, you can completely transform your kitchen and add value to your home without hiring a contractor.

