
If your closet feels cluttered, chaotic, or simply not functional, it might be time to take matters into your own hands and build a custom closet system. A well-designed closet not only maximizes space but also brings a sense of calm and efficiency to your daily routine. Whether you’re working with a spacious walk-in or a small reach-in, creating a custom closet tailored to your specific needs is more achievable than you might think.
In this guide, you’ll learn how to build a custom closet from planning and measuring to choosing materials and installing shelving. Whether you’re a seasoned DIYer or tackling your first home improvement project, these steps will help you transform your space into an organized, stylish storage solution.
1. Assess Your Needs and Goals
Before you pick up a drill or buy any materials, take the time to evaluate what your custom closet system must accomplish.
-
Inventory Your Items: Count how many long and short hanging garments you have, how many pairs of shoes, and any accessories like hats, belts, or bags. Do you need space for folded clothes, drawers for undergarments, or bins for seasonal storage?
-
Think About the User: Is this a solo closet, a shared space, or a child’s closet? Each situation has unique storage demands.
-
Define Your Priorities: Are you looking to increase hanging space, hide clutter, or add more shelves? Get clear on your goals before moving to the next step.
This early planning phase is the foundation for an efficient and personalized closet design.
2. Measure and Plan Your Space
Accurate measurements are essential when building a DIY closet system. Skipping this step or guessing dimensions could lead to costly mistakes and wasted materials.
-
Take Full Measurements: Measure the height, width, and depth of the space. Don’t forget to measure each wall individually and note any irregularities.
-
Account for Obstacles: Be aware of baseboards, vents, angled ceilings, outlets, or light switches that may affect design or installation.
-
Sketch Your Layout: Use graph paper or a free online closet planner to draft your space. Visualizing the setup will help you spot inefficiencies before you begin construction.
Closet organization ideas often come together best once you understand your space’s true potential and limitations.
3. Design the Layout
Now it’s time to bring your vision to life. A great closet layout balances aesthetics with practicality.
-
Include Different Storage Zones:
-
Long hanging: For coats, dresses, and gowns
-
Short hanging: For shirts, skirts, and pants
-
Shelving: For folded items and storage bins
-
Drawers: For accessories or undergarments
-
Shoe racks or cubbies
-
-
Decide on Open vs. Closed Storage: Open shelves offer quick access, while drawers and doors create a cleaner look and keep dust away.
-
Think Vertical: Use the full height of the wall to add high shelves for seasonal items or storage bins.
A successful custom closet design feels intuitive and adapts to your evolving lifestyle.
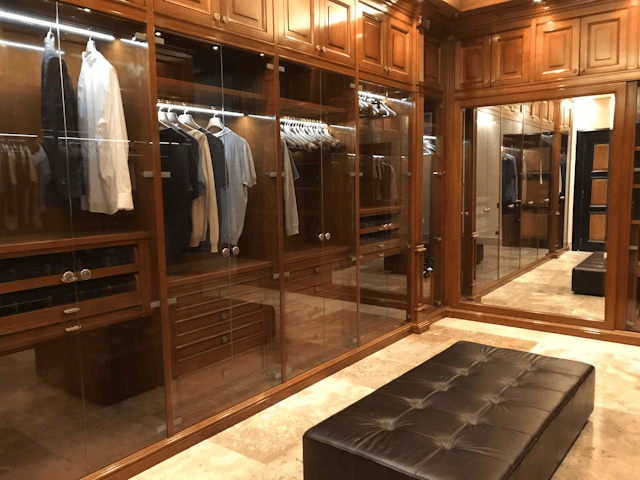
4. Choose Materials and Components
Your closet system’s durability and aesthetics depend largely on the materials you select.
-
Common Materials:
-
Melamine or laminate: Affordable and easy to clean
-
Plywood or MDF: Ideal for painted finishes
-
Wire systems: Budget-friendly and ventilated, but may lack style
-
Solid wood: More expensive but long-lasting and premium-looking
-
-
Components to Include:
-
Adjustable shelving
-
Closet rods (chrome or wood)
-
Pull-out baskets
-
Built-in drawers
-
Wall-mounted or floor-based systems
-
Your choices should reflect your budget, design preferences, and how long you intend to stay in your current home.
5. Build or Install the Closet System
Depending on your skill level, you can either buy a modular closet kit or go full DIY by cutting and assembling your own custom pieces.
-
DIY Closet System Tips:
-
Use a level and stud finder when anchoring to the wall.
-
Pre-drill holes to avoid splitting wood.
-
Label all parts before assembly to streamline installation.
-
-
Essential Tools:
-
Drill and driver bits
-
Stud finder
-
Circular saw or jigsaw (if cutting shelves)
-
Tape measure
-
Level and pencil
-
-
Safety Matters: Wear protective gear, and ensure heavy shelves or rods are secured into wall studs or proper anchors.
Building your own system can be cost-effective and satisfying—but don’t hesitate to hire a carpenter or handyman if you’re unsure about certain steps.
6. Add Final Touches
After the structure is installed, bring it to life with stylish and functional accents.
-
Install Lighting: LED strips, motion-sensor lights, or overhead fixtures brighten the space and make items easier to find.
-
Use Decorative Bins or Baskets: Great for seasonal items, accessories, or smaller essentials that don’t need to be on display.
-
Incorporate Mirrors or Hooks: Full-length mirrors enhance visibility, and hooks offer quick access to frequently used items.
-
Label Everything: Especially useful in shared or kids’ closets to maintain order.
These details personalize your closet and make the space feel finished and intentional.
7. Maintenance and Organization Tips
Once your closet is built, staying organized is key to keeping it functional long-term.
-
Seasonal Swaps: Store off-season clothes in high shelves or under-bed bins to free up space.
-
Declutter Regularly: Adopt the “one in, one out” rule for clothes and accessories to prevent overcrowding.
-
Use Organizers: Drawer dividers, shelf risers, and hanging storage can all help optimize even more space.
A well-maintained closet reduces stress, saves time, and keeps your home looking clean and polished.
Conclusion
Knowing how to build a custom closet puts control in your hands to design a space that truly fits your lifestyle. With smart planning, the right materials, and a little elbow grease, you can go from chaotic closet to organized sanctuary. Whether you opt for a DIY closet system or mix in some professional help, the end result is a space that makes your daily routine smoother and more enjoyable.