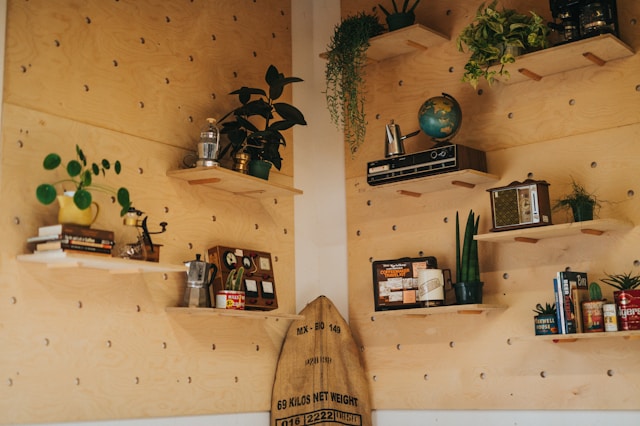
Floating shelves are a sleek and stylish way to add storage and character to any room without taking up floor space. Whether you’re upgrading your living room, organizing your kitchen, or adding flair to a hallway, floating shelves offer a clean, modern look with minimal hardware visibility. The good news? You can build floating shelves yourself with a few basic tools, some wood, and a bit of DIY enthusiasm.
In this guide, you’ll learn how to build floating shelves from scratch, what materials and tools you’ll need, and how to properly install them so they’re safe, secure, and beautiful.
Why Build Floating Shelves?
Building floating shelves is one of the most beginner-friendly home improvement projects. They’re affordable, customizable, and practical. Plus, homemade wall shelves allow you to match your décor and make the most of unused wall space.
Benefits of floating shelves:
-
Space-saving solution for small areas
-
Clean, modern appearance
-
Budget-friendly DIY project
-
Easy to personalize with paint, stain, or wood type
-
Functional storage and display for any room
Materials and Tools You’ll Need
Before you begin, gather the necessary materials and tools for your DIY floating shelves.
Materials:
-
Wood boards (e.g., 1x8s, 2x10s, or plywood for custom depth)
-
Wall anchors or heavy-duty drywall anchors (if no studs)
-
Screws (wood screws and lag screws)
-
Wood glue
-
Finishing nails (if building hollow shelves)
-
Wood filler (optional, for a cleaner look)
-
Paint, stain, or sealer (optional)
Tools:
-
Stud finder
-
Power drill and bits
-
Level
-
Measuring tape
-
Circular saw or miter saw
-
Sander or sanding block
-
Clamps (optional but helpful)
-
Screwdriver
-
Safety gear (gloves, goggles)
How to Build Floating Shelves: Step-by-Step
Now, let’s walk through how to build and install floating shelves, from planning to finishing.
Step 1: Plan and Measure
Start by selecting the wall where your shelves will go. Use a stud finder to locate wall studs you’ll need them for secure installation. Mark the desired height and spacing for each shelf with a pencil.
Tips:
-
Leave at least 10–12 inches of vertical space between shelves
-
Use painter’s tape to visualize the layout
-
Choose a shelf depth of 8–12 inches for typical storage
Step 2: Cut and Prepare the Wood
Cut your shelf boards to the desired length. Sand each piece thoroughly, smoothing the edges and surface. If you want a stained or painted finish, now is a good time to apply it.
Pro tip: Choose quality wood like pine, oak, or poplar for durability and appearance.
Step 3: Build the Shelf Frame (for Hollow Shelves)
If you’re making hollow-core shelves that slide onto a hidden bracket:
-
Cut internal support pieces (usually 2×2 or 1×2 wood)
-
Construct a rectangular frame with a back piece that mounts to the wall
-
Attach the front and sides using glue and finishing nails
-
Sand and finish the assembled shelf box
For simpler floating shelves, you can also mount solid wood directly to hidden brackets or heavy-duty wall anchors.
Step 4: Mount the Wall Brackets or Frame
Use your level to mark the bracket lines and drill pilot holes into the wall studs. If you can’t find studs, use toggle bolts or wall anchors rated for your shelf’s expected weight.
Secure the wall cleat or bracket using lag screws. Ensure it is completely level before proceeding.
Important: Wall-mounted shelf installation is only as strong as the anchors and fasteners used. Never skip the level or drill steps.
Step 5: Attach the Shelf
Slide the hollow shelf box over the wall-mounted frame and secure it with screws from the top or bottom. If you’re using visible brackets, screw the shelf onto them through pre-drilled holes.
Check once again with a level to confirm the shelf is straight.
Finishing Touches
Now that your shelf is installed, it’s time to make it pop.
Finishing options:
-
Paint in your wall color for a seamless floating look
-
Stain the wood for a rustic or natural vibe
-
Use polyurethane or water sealant for durability in bathrooms or kitchens
Styling tips:
-
Use in the kitchen for spice jars, cups, or plants
-
In the living room, try framed photos, candles, or books
-
Add LED strip lights underneath for an ambient glow
Common Mistakes to Avoid
When building floating shelves, avoid these DIY pitfalls:
-
Skipping the level: Even a slightly tilted shelf is noticeable
-
Ignoring stud placement: Anchoring into drywall alone may not hold up
-
Overloading shelves: Know the weight limit and distribute items evenly
-
Using low-quality materials: Warped or soft woods reduce shelf strength
Conclusion
Learning how to build floating shelves is a rewarding DIY project that adds both function and style to your home. With the right tools, a bit of planning, and a step-by-step approach, you can install custom floating shelves that suit your space, budget, and design taste.

