
Raised bed gardening has become a favorite among home gardeners and for good reason. Whether you’re looking to grow vegetables, herbs, or flowers, learning how to build a raised garden bed can transform your backyard or patio into a productive and beautiful space.
Raised garden beds offer better soil control, improved drainage, easier access, and fewer weeds. For beginners and seasoned green thumbs alike, this guide will walk you through every step of building your own raised bed and setting up a thriving garden.
Why Choose a Raised Garden Bed?
Raised bed gardening is ideal for both urban and suburban environments. It allows you to grow plants in a controlled environment with better soil quality and less bending or kneeling. Whether you’re working with poor native soil or limited space, a vegetable garden bed built above ground is a simple and effective solution.
Key benefits of a raised garden bed include:
-
Improved drainage and reduced soil compaction
-
Better control over soil quality and pH
-
Easier access for planting, weeding, and harvesting
-
Less competition from weeds and tree roots
-
Extended growing seasons when paired with cold frames or covers
Now, let’s walk through how to build a raised garden bed from scratch.
Step 1: Choose the Right Location
Location is everything in gardening. To ensure your plants thrive, choose a spot that receives at least 6–8 hours of full sunlight daily. Good air circulation and easy access to a water source are also important. Avoid placing your bed too close to trees, which can steal nutrients and moisture, or in areas with poor drainage.
Pro tip: Observe the area throughout the day to see how much sunlight it really gets especially if you’re planning to grow sun-loving vegetables.
Step 2: Decide on Size and Materials
One of the most common beginner gardening tips is to start small and expand later. The standard size for a DIY raised garden bed is 4×4 or 4×8 feet. This size makes it easy to reach plants without stepping into the bed and compact enough for most spaces.
Height
Most raised beds are 12 to 24 inches tall. A deeper bed allows for better root development, especially if you plan to grow root vegetables like carrots or potatoes.
Materials
-
Cedar or redwood: Naturally rot-resistant and chemical-free
-
Untreated pine: Inexpensive but may decay faster
-
Metal: Durable and modern-looking, but can retain heat
-
Composite materials: Made from recycled plastics and wood fibers, they’re weather-resistant and long-lasting
Avoid treated lumber that may leach chemicals into the soil, especially if you’re planting edible crops.
Step 3: Gather Your Tools and Supplies
Before you start building, gather everything you need:
Tools:
-
Saw (or have wood pre-cut)
-
Drill or screwdriver
-
Screws or brackets
-
Tape measure
-
Level
-
Shovel or hoe
Optional supplies:
-
Landscape fabric or weed barrier
-
Corner brackets for extra stability
-
Stakes to anchor the bed
Step 4: Build Your Raised Garden Bed
Now that you’ve chosen your spot and gathered your materials, it’s time to build. Here’s how to build a raised garden bed step by step:
1. Measure and Mark the Area
Use a tape measure to mark your garden bed’s dimensions on the ground. Ensure the area is level for even water distribution.
2. Cut and Assemble the Frame
Cut your boards to the desired length and screw them together at the corners to form a rectangular or square frame. Use a level to ensure all sides are even.
3. Prepare the Ground
Remove grass or weeds inside the marked area. Use a shovel or hoe to loosen the soil beneath for better drainage. If pests are a concern, you can install a layer of hardware cloth before placing the frame.
4. Install a Weed Barrier (Optional)
Add a layer of landscape fabric or cardboard to suppress weeds and prevent grass from growing into your garden bed.
5. Place and Anchor the Frame
Position the frame in your prepared spot. Use corner brackets or stakes to secure it in place, especially if your bed is tall or in a windy area.
Step 5: Fill Your Garden Bed with Soil
The best soil for raised beds is light, well-draining, and full of nutrients. A popular mix is:
-
60% topsoil
-
30% compost
-
10% peat moss or coco coir
You can also add perlite or vermiculite to improve aeration. Fill your bed almost to the top, leaving 1–2 inches of space to prevent runoff when watering.
Test your soil’s pH and nutrient levels if possible, and amend as needed before planting.
Step 6: Start Planting
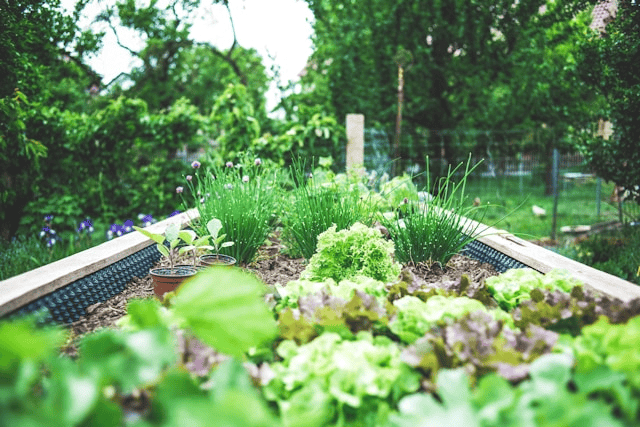
Raised garden beds are perfect for growing everything from leafy greens to tomatoes to herbs. When choosing what to plant, consider spacing, sunlight needs, and compatibility.
Best plants for raised beds:
-
Leafy greens (lettuce, spinach, kale)
-
Tomatoes and peppers
-
Root vegetables (carrots, beets, radishes)
-
Herbs (basil, thyme, rosemary)
-
Strawberries and bush beans
Consider using companion planting to maximize space and improve plant health. Rotate crops each season to prevent soil depletion and reduce disease risk.
Step 7: Maintain Your Raised Garden Bed
Once your garden is planted, it’s time to nurture it. Here are some basic raised garden bed tips for care and maintenance:
-
Water consistently: Raised beds can dry out faster than ground-level gardens
-
Mulch to retain moisture and reduce weeds
-
Fertilize as needed with organic options
-
Watch for pests and diseases early
-
Add compost each season to refresh the soil
Over time, you may need to top off the bed with fresh soil or compost as it settles.
Final Thoughts
Building your own raised garden bed is a simple DIY project with big rewards. Not only do you gain a productive growing space, but you also reconnect with nature and enjoy healthier, fresher food. Whether you’re in a small backyard or on a city balcony, raised bed gardening puts the power of sustainability and beauty at your fingertips.