
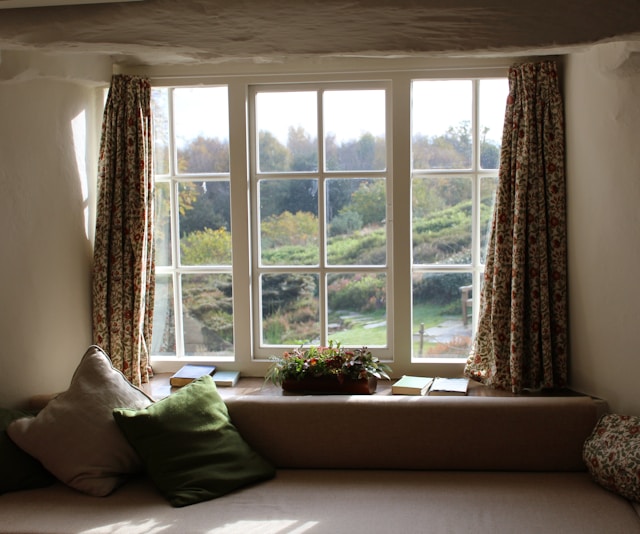
A window seat is more than just a cozy nook it’s a functional and stylish addition to any home. Whether you live in a spacious house or a small apartment, learning how to build a window seat with storage can help you maximize space while adding charm and comfort to your room. The best part? With a few tools and a weekend’s worth of effort, you can build it yourself.
In this DIY guide, we’ll walk you through every step of building a window seat storage bench from planning and measuring to the finishing touches. Whether you’re a seasoned woodworker or a weekend DIYer, this project is beginner-friendly and fully customizable.
Why Build a Window Seat with Storage?
Adding a DIY window seat offers several benefits:
-
Extra storage: Ideal for hiding blankets, books, toys, or seasonal items.
-
Efficient use of space: Great for bay windows, unused corners, or under large windows.
-
Aesthetic appeal: Adds architectural interest and character to a room.
-
Functional seating: Doubles as a reading nook, breakfast area, or extra seating for guess.
Whether you want a custom built-in window seat or a freestanding storage bench under a window, the end result can elevate your home’s design while solving storage issues.
Planning and Designing Your Window Seat
Before you get started, take time to plan your project properly. The success of your build depends on good measurements and a clear vision.
Step 1: Measure Your Space
-
Measure the width and height of the window and surrounding wall area.
-
Consider the depth of the seat standard seating depth is around 16 to 20 inches.
-
Plan for the height to be about 18 inches off the ground for comfortable seating.
Step 2: Choose Your Storage Type
There are a few ways to incorporate storage:
-
Lift-top bench: The top opens like a chest perfect for larger items.
-
Drawers: More accessible and great for organizing.
-
Cubbies or shelves: Ideal for books, baskets, or decorative storage.
Step 3: Visualize the Final Look
Sketch a simple plan or use design software. Consider how the seat will blend with your room do you want it to match your trim, stand out with a bold color, or look like a built-in?
Tools and Materials You’ll Need
This project doesn’t require advanced skills, but you will need some basic tools and supplies. Here’s a general list:
Tools:
-
Measuring tape
-
Circular saw or table saw
-
Power drill and bits
-
Level
-
Nail gun or hammer
-
Screwdriver
-
Sandpaper or electric sander
Materials:
-
Plywood or MDF (for the frame and top)
-
2x4s (for the base frame)
-
Hinges (for lift-top lid, if used)
-
Wood screws and nails
-
Wood filler
-
Paint or wood stain
-
Cushion foam and fabric (optional for comfort)
Make sure to buy materials based on your measured dimensions. A downloadable cut list can be helpful if you’re following a specific design plan.
Instructions to Build a Window Seat with Storage
Step 1: Build the Frame/Base
-
Cut your 2x4s to match the length and depth of your bench.
-
Create a rectangular base and secure with wood screws.
-
Add support beams across the middle for added strength.
-
Set the frame in place under your window and ensure it’s level.
Step 2: Build the Box
-
Attach plywood to the frame to create the front and side panels.
-
Screw plywood panels into the base to form the storage compartment.
-
Add corner braces or internal supports if you plan to store heavy items.
Step 3: Add the Top
-
Cut a piece of plywood for the bench top.
-
If using a lift-top design, attach the lid with piano or butt hinges at the back.
-
Leave a small gap between the wall and lid for smooth opening.
-
For drawer-style storage, cut the front panel and install drawer slides.
Step 4: Customize the Look
-
Add trim or molding around the base and sides for a built-in appearance.
-
Fill holes with wood filler and sand smooth.
-
Prime and paint or stain your bench to match your décor.
Finishing Touches and Comfort Upgrades
Now that the structure is complete, it’s time to make it cozy and functional.
Add a Cushion
-
Measure the seat and cut high-density foam to size.
-
Cover the foam with a fabric of your choice using a staple gun or sew a fitted cover.
-
Add decorative throw pillows for extra comfort.
Install Handles or Pulls
If you’ve added drawers or a hinged lid, install handles for easy access.
Final Styling Tips
-
Decorate your window seat with a mix of soft textures and colors.
-
Use matching storage bins or baskets inside cubbies or the compartment.
-
Place plants, a floor lamp, or a small side table nearby to complete the nook.
Tips for Customization
-
Want a farmhouse look? Use shiplap paneling on the front.
-
Prefer a modern vibe? Go with clean lines and minimal hardware.
-
Short on space? Build a narrow bench with vertical cubbies.
This is a great woodworking project for beginners because it offers room for creativity. You can tweak your DIY window seat ideas to suit your home’s style and storage needs.
Conclusion
Knowing how to build a window seat with storage opens up opportunities to enhance your home with both function and charm. It’s a practical project that transforms wasted space into a cozy seating area while giving you smart storage solutions.
Whether you’re creating a custom built-in window seat or a freestanding storage bench under a window, this DIY project is as rewarding as it is useful. With a bit of planning, a few tools, and your personal touch, your new window nook can become the favorite spot in your home.