
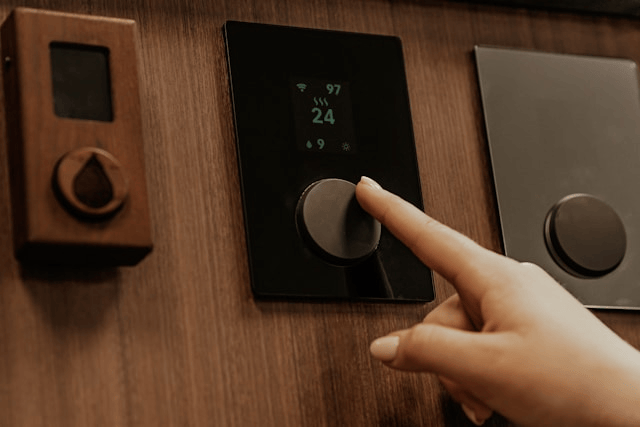
Installing a smart thermostat is one of the easiest and most impactful upgrades you can make to your home. It can help you save money on energy bills, automate your heating and cooling, and give you remote control of your climate system from your phone or smart speaker.
Whether you’re looking to install a Nest, Ecobee, Honeywell, or another brand, this smart thermostat installation guide will walk you through every step from removing your old unit to configuring your new device.
Why Upgrade to a Smart Thermostat?
Before diving into the how-to, it’s worth noting the benefits of smart thermostats:
-
Energy efficiency: Reduce energy consumption with smart scheduling and occupancy sensors.
-
Remote access: Adjust temperatures from your smartphone, even when you’re not home.
-
Smart home integration: Works with systems like Amazon Alexa, Google Assistant, or Apple HomeKit.
-
Insights and reports: Many models provide energy usage reports and optimization tips.
Now let’s look at how to install a smart thermostat in your home.
Before You Begin
Tools You’ll Need:
-
Screwdriver (flathead and Phillips)
-
Drill (optional, depending on wall material)
-
Wire labels or masking tape
-
Level
-
Smartphone or tablet for setup
Safety First:
Always turn off the power to your HVAC system at the circuit breaker before you begin any thermostat wiring instructions. Double-check by attempting to turn on the heating or cooling if nothing happens, you’re good to go.
Check Compatibility:
Not all HVAC systems are compatible with every smart thermostat. Before purchasing, use the manufacturer’s online compatibility checker or check your existing thermostat’s wiring. Most modern thermostats support systems with a C-wire (common wire), though some models offer C-wire adapters.
Step 1: Remove the Old Thermostat
-
Take off the faceplate of your old thermostat most pop off with gentle pressure.
-
Label the wires connected to the terminals (e.g., R, W, Y, G, C) using the provided stickers or a piece of tape.
-
Unscrew and remove the mounting plate from the wall.
-
Make sure the wires don’t slip back into the wall. You can wrap them around a pencil or secure them with tape while you work.
Step 2: Install the New Mounting Plate
-
Hold your smart thermostat’s mounting plate against the wall.
-
Use a level to ensure it’s straight.
-
Mark and drill holes for the mounting screws, if necessary.
-
Thread the wires through the center of the mounting plate.
-
Secure the plate to the wall using the screws provided.
Some models include wall trim plates to cover gaps or old paint lines from your previous thermostat.
Step 3: Connect the Wires
-
Insert the labeled wires into the matching terminals on the smart thermostat base. Common wire labels include:
-
R or Rc/Rh – Power
-
W – Heat
-
Y – Cooling
-
G – Fan
-
C – Common wire (for power)
-
-
Push each wire firmly into the corresponding slot until it clicks or holds in place.
-
Secure any unused wires so they don’t touch each other or any terminals.
What If You Don’t Have a C-Wire?
Some thermostats can operate without a C-wire using battery power or a power extender kit. If your HVAC system doesn’t support this, you may need to install a C-wire adapter (often included in the box or sold separately).
Step 4: Attach and Power On the Thermostat
-
Snap the smart thermostat faceplate onto the mounted base.
-
Restore power at the circuit breaker.
-
The thermostat should power on automatically and guide you through the initial setup.
If it doesn’t power on, double-check your wiring and breaker.
Step 5: Setup and Configuration
Once powered on, your thermostat will walk you through:
-
Wi-Fi connection
-
System type confirmation (forced air, heat pump, radiant, etc.)
-
Location and room naming
-
Temperature preferences and schedules
-
Smart home integration (optional but recommended)
Using your smartphone, download the thermostat’s companion app (e.g., Nest, Ecobee, or Honeywell Home). The app allows remote control, scheduling, and system monitoring.
Troubleshooting Tips
Thermostat doesn’t turn on?
-
Ensure power is on at the breaker.
-
Double-check wiring connections.
-
Make sure wires are fully inserted and secured.
Wi-Fi connection failed?
-
Check your network credentials.
-
Ensure your thermostat is within range of your router.
-
Restart your router if needed.
No C-wire?
-
Use a power extender kit or consider professional installation if unsure.
If problems persist, consult your thermostat’s support site or contact an HVAC technician.
Conclusion
Installing a smart thermostat can be a rewarding DIY project that boosts your home’s comfort, efficiency, and connectivity. By following this smart thermostat installation guide and using the proper thermostat wiring instructions, most homeowners can complete the upgrade in under an hour.