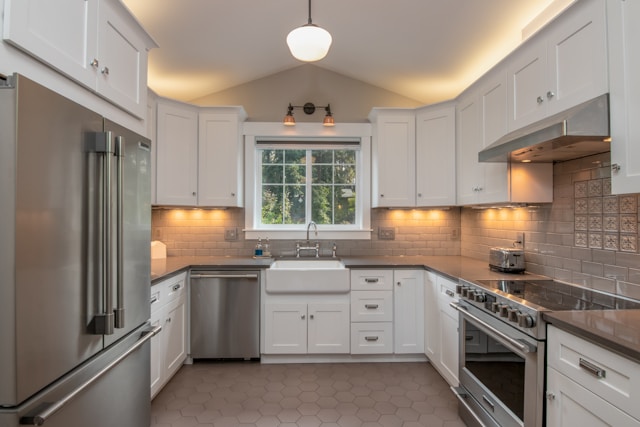
Painting your kitchen cabinets is one of the most budget-friendly and transformative ways to refresh your kitchen. Whether you’re tired of outdated wood finishes or just want a new look without replacing everything, a well-done paint job can make your cabinets look brand new. But to get that clean, professional finish, you’ll need more than just a can of paint and a brush.
In this guide, you’ll find practical tips for painting kitchen cabinets from prep to finish so you can avoid common mistakes and enjoy a kitchen that looks like it had a designer’s touch (even if it’s your first DIY project).
Why Paint Your Kitchen Cabinets?
Before diving into the how-to, it’s worth noting why this project is so popular:
-
It costs significantly less than replacing cabinets
-
It allows you to customize your space with color
-
It gives older kitchens a fresh, updated appearance
-
It’s achievable with the right tools and patience
If done right, repainting kitchen cabinets can yield results that rival a full renovation.
Are Your Cabinets Paintable?
Not all cabinets are ideal candidates for paint. Before you begin, assess what you’re working with.
Best materials for painting kitchen cabinets:
-
Solid wood: The best surface for painting, especially when properly prepped.
-
MDF (medium-density fiberboard): Smooth and paintable, though prone to swelling if not sealed correctly.
-
Laminate or veneer: Can be painted, but requires extra prep and a quality bonding primer.
If your cabinets are warped, water-damaged, or falling apart, it might be time to consider replacement instead.
Gather the Right Tools and Materials
Having the right supplies is key to a successful DIY cabinet painting project. Here’s what you’ll need:
-
Paint: Choose high-quality latex or oil-based paint. Semi-gloss or satin enamel finishes are ideal for durability and easy cleaning.
-
Primer: Use a bonding primer, especially for glossy or laminate surfaces.
-
Degreaser or TSP: To clean off years of kitchen grime.
-
Sandpaper (120–220 grit): For smoothing and dulling surfaces.
-
Screwdriver or drill: For removing doors, hinges, and hardware.
-
Painter’s tape: To protect surrounding areas.
-
Brushes and foam rollers: Angled brushes for corners and foam rollers for smooth finishes.
-
Drop cloths and plastic sheets: To protect floors and countertops.
Optional: A paint sprayer for a smoother, factory-like finish.
Preparation: The Most Important Step
When it comes to how to paint kitchen cabinets, prep work can’t be skipped. In fact, it often takes more time than the painting itself.
Step 1: Remove Doors and Hardware
Label each door and drawer as you remove them so reassembly is easy. Keep screws and hardware in labeled bags.
Step 2: Clean Thoroughly
Cabinet surfaces especially near the stove can be coated in grease. Use a degreaser or TSP to get them clean. Rinse with water and let them dry completely.
Step 3: Sand
Lightly sand all surfaces to remove gloss and help the primer stick. Focus on flat surfaces and lightly hand-sand details and corners.
Step 4: Fill and Repair
Use wood filler to patch dents, holes, or old hardware marks. Sand the patched areas smooth after drying.
Step 5: Tape and Protect
Use painter’s tape to protect walls, counters, and floors. Lay down drop cloths to catch drips.
Step 6: Prime
Apply a quality primer to all surfaces you plan to paint. This step ensures better paint adhesion and longer-lasting results. For stained wood or laminate, a stain-blocking or bonding primer is essential.
Painting Your Kitchen Cabinets: Step-by-Step
Once your cabinets are prepped and primed, it’s time to paint.
Step 1: Paint the Cabinet Frames
Start with the cabinet boxes. Use a brush for edges and a foam roller for flat areas. Apply thin, even coats.
Step 2: Paint Doors and Drawers
Lay doors flat and use light coats to avoid drips and pooling. Let each coat dry fully before flipping to paint the other side.
Step 3: Apply a Second Coat
Two coats are usually sufficient, but always evaluate coverage. Let the first coat dry fully before adding the second.
Step 4: Optional Topcoat
For added durability, especially in high-traffic kitchens, apply a water-based polyurethane topcoat in a satin or semi-gloss finish.
Reassembly and Finishing Touches
Once everything is fully dry (give it at least 24–48 hours), reinstall hardware and mount the doors and drawers.
Final Details:
-
Clean off dust or smudges
-
Touch up any missed spots
-
Replace or update hardware for a fresh look
Pro tip: Soft-close hinges and modern knobs or pulls can dramatically improve the overall appearance.
Common Mistakes to Avoid
Even the best intentions can go wrong without the right approach. Avoid these pitfalls:
-
Skipping cleaning or sanding: Paint won’t stick properly
-
Using the wrong type of paint: Cabinet-specific paint ensures durability
-
Rushing the process: Thick coats cause drips and uneven finishes
-
Not labeling doors/drawers: Reassembly can become a confusing puzzle
-
Painting without proper ventilation: Always work in a well-ventilated area for safety
Maintenance Tips for Painted Cabinets
After all your hard work, you’ll want to keep your cabinets looking great:
-
Clean gently with a soft cloth and mild soap
-
Avoid abrasive sponges or harsh chemicals
-
Touch up chips promptly to prevent peeling
-
Open windows regularly to reduce humidity buildup in the kitchen
Final Thoughts
Painting kitchen cabinets is one of the most effective ways to refresh your kitchen without a major renovation. While it takes time and patience, the results can be stunning and extremely satisfying.
By following these tips for painting kitchen cabinets, you’ll ensure a smoother process and a finish that lasts. Whether you’re doing it to prepare for a home sale or simply to love your kitchen more, a fresh coat of paint can breathe new life into your space.

