
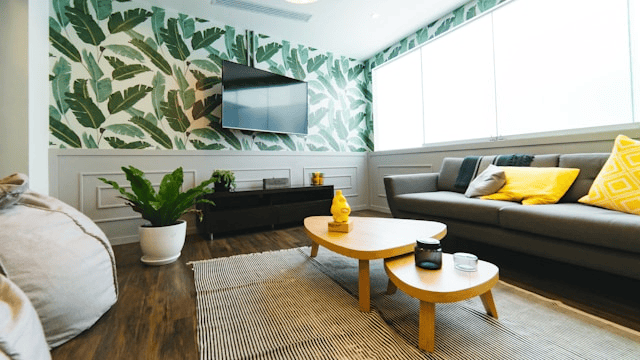
Peel-and-stick wallpaper has become a game-changer in the world of DIY home décor. Whether you’re a renter looking for a non-permanent way to personalize your space or a homeowner who loves quick and stylish updates, this self-adhesive wallpaper is a perfect solution. It’s affordable, versatile, and easy to apply no messy glue required.
In this guide, you’ll learn how to install peel and stick wallpaper step by step, along with helpful tips to avoid common pitfalls and get a smooth, professional-looking finish.
What Is Peel-and-Stick Wallpaper?
Peel-and-stick wallpaper, also known as self-adhesive or removable wallpaper, is a vinyl or fabric-based wall covering with a sticky backing. Much like a giant sticker, it can be applied directly to your wall and repositioned if needed. It’s ideal for accent walls, rental homes, dorm rooms, furniture makeovers, and more.
The best part? You don’t need professional help or special tools. With a bit of preparation and patience, anyone can take on this DIY wallpaper installation.
What You’ll Need
Before you begin, gather the following supplies:
-
Peel-and-stick wallpaper rolls
-
Measuring tape
-
Level or plumb line
-
Pencil
-
Utility knife or sharp scissors
-
Smoothing tool (plastic scraper or old credit card)
-
Step stool or ladder
-
Clean cloth and mild cleaner
Preparing the Surface
Proper preparation is key to a successful peel-and-stick wallpaper installation. Here’s what you need to do:
-
Clean the wall thoroughly with a damp cloth and mild soap to remove dust, dirt, or grease. Let it dry completely.
-
Fix any holes or imperfections with spackle and sand the surface smooth.
-
Avoid textured walls peel-and-stick wallpaper sticks best to smooth, flat surfaces.
-
Allow fresh paint to cure for at least 2–4 weeks before applying wallpaper.
Taking the time to prepare your wall ensures better adhesion and a longer-lasting finish.
Measuring and Planning
One of the most overlooked steps in applying self-adhesive wallpaper is accurate measuring and planning.
-
Measure the height and width of your wall to determine how many rolls you’ll need. Most wallpaper packaging will indicate the coverage area per roll.
-
Mark a straight vertical line using a level or plumb line to guide your first strip. This is especially important if your walls or ceilings aren’t perfectly straight.
-
Decide your starting point usually a corner or the center of the wall, depending on the design pattern.
Planning ahead makes the process smoother and helps align the wallpaper properly.
How to Install Peel and Stick Wallpaper
Now that you’re ready, follow these steps to apply the wallpaper:
Step 1: Peel the Backing
Start by peeling down a few inches of the backing paper from the top of the first strip. Be careful not to touch the sticky side too much.
Step 2: Align and Stick
Line up the top of the wallpaper with your guideline. Press the top part onto the wall and smooth it lightly.
Step 3: Apply Gradually
Peel down more of the backing paper slowly, working your way down the wall. Use your smoothing tool to press the wallpaper against the wall and eliminate air bubbles as you go.
Step 4: Trim the Edges
Use a sharp utility knife to trim any excess wallpaper along the top, bottom, and sides. Press the edges firmly for a clean finish.
Repeat the process with the next strip, aligning patterns as needed.
Matching Patterns and Seams
If your wallpaper has a repeating pattern, take extra care to match the design between strips. Overlap or butt the edges together based on the manufacturer’s instructions. A poorly aligned pattern can ruin the overall look, so take your time and double-check before pressing the strip fully onto the wall.
Troubleshooting and Tips
Even with the best intentions, hiccups can happen. Here are some common issues and how to fix them:
-
Crooked placement? Gently peel the strip back and realign it. Most peel-and-stick wallpapers can be repositioned a few times.
-
Air bubbles? Use a smoothing tool to press them out from the center toward the edges.
-
Dealing with corners or outlets? Cut the wallpaper with scissors to fit around these areas. Use a utility knife for precision trimming.
Finishing Touches
Once all your strips are up:
-
Recheck for any bubbles or loose edges.
-
Smooth down seams gently but firmly.
-
Wipe the wallpaper lightly with a dry cloth to remove any fingerprints or dust.
Stand back and admire your work it’s amazing how peel-and-stick wallpaper can instantly transform a space!
Maintenance and Removal
One of the biggest perks of removable wallpaper is that it’s easy to maintain and remove.
-
To clean: Use a soft, damp cloth. Avoid abrasive cleaners that can damage the surface.
-
To remove: Start at a corner and peel it slowly from the wall. If any residue remains, wipe it down with a gentle adhesive remover or warm soapy water.
No scraping, steaming, or harsh chemicals needed.
Conclusion
Learning how to install peel and stick wallpaper is a great way to refresh any room without the mess and commitment of traditional wallpaper or paint. With a little preparation, the right tools, and a steady hand, you can achieve stunning, professional-looking results on your own.